Choose the location before the photographs
Think about where the collection will be seen in everyday life: a hallway you pass each morning, a dining-room wall, or a quiet corner of the living room. Pick a place with enough clear space to view the whole arrangement and practical access for secure installation.
Keep the gallery away from cribs and infant sleep spaces. Health Canada's nursery guidance advises hanging artwork away from the crib because it can fall or be pulled down. For this project, also avoid placing frames where children play, climb, or can reach them from nearby furniture.
Look at the light during the day. A wall that receives strong direct sun may be less suitable for photographs you want to display long term. Consider reflections from the intended viewing position as well; a beautiful layout is less enjoyable if you mostly see a bright window in the glazing.
Decide which story the wall will tell
A gallery becomes easier to plan when it has a clear theme. You might choose the first year, one newborn session, the family across several generations, or a mixture of portraits and small details.
For a first-year story, select a few anchor months and one family image rather than assuming all twelve photographs must fit the available wall. For a newborn collection, combine a clear face portrait, a parent-and-baby picture, and a hand or foot detail. For a family history, repeat a frame style to connect photographs taken in different places and decades.
Lay the chosen images together on a screen or as small draft prints. Ask whether each adds a new person, expression, detail, or moment. A second image deserves its place because it contributes to the story, not merely because it came from the same session.
Choose one of three manageable layouts
A three-picture row
Three similar frames create an easy starting point. Choose one family image and two closer portraits, or three monthly photographs that show a meaningful passage of time. Use consistent gaps and align the frame tops or centres.
This arrangement is especially useful when you want a finished-looking wall without selecting a large number of pictures. You can change the images later while leaving the overall structure in place.
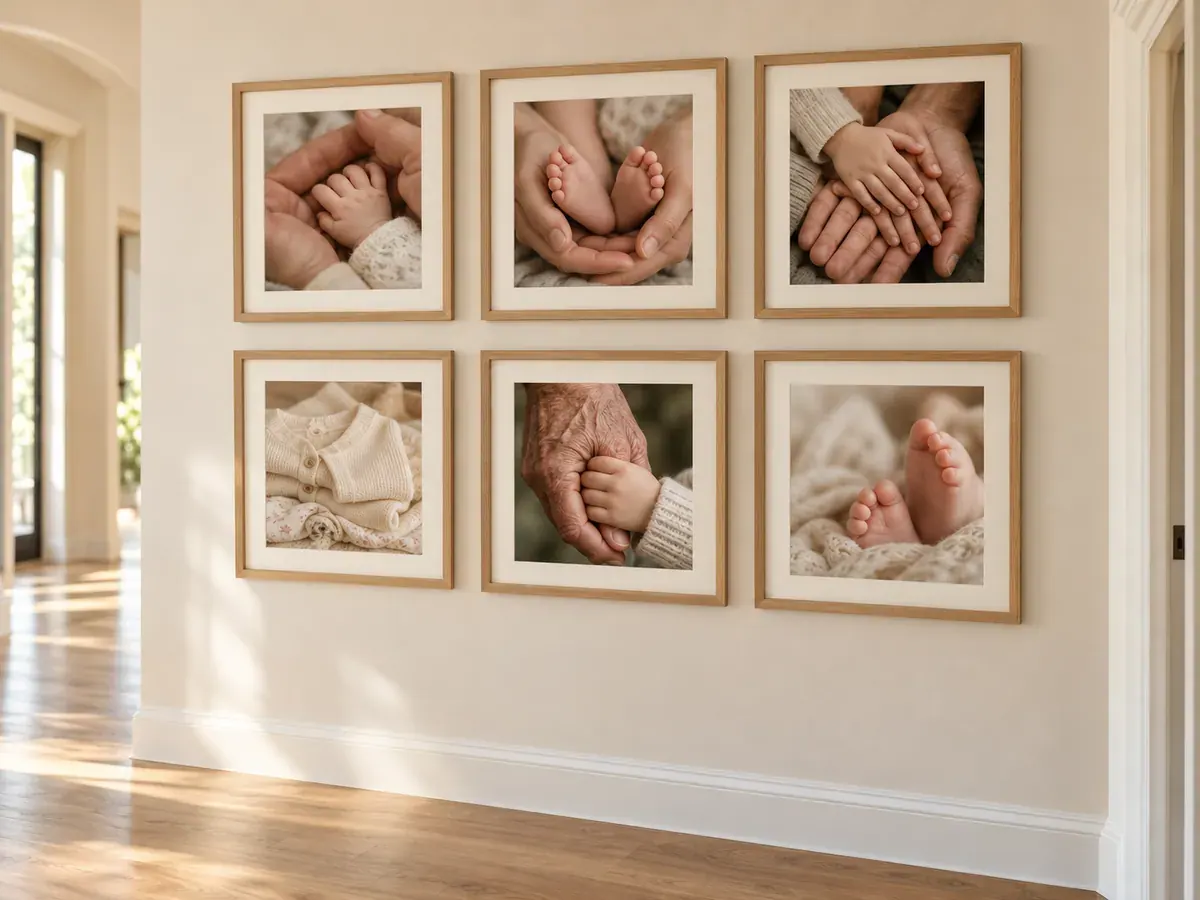
A six-picture grid
A grid suits a collection of square crops or pictures with similar framing. Two rows of three frames create a clear rhythm. If the photographs vary in colour or background, the repeated frame size gives them something in common.
Choose the order before mounting. You might read the story from left to right, or place the brightest images diagonally across the grid to avoid one heavy visual corner. These are design choices you can test with small printouts.
One main portrait with smaller companions
Use a larger family image as the centre of attention, then add two or four smaller photographs. Keep a shared frame material or mat colour so the different sizes feel intentional.
This arrangement can work when one photograph matters most but the surrounding details complete its story. Test the whole grouping as one shape rather than aligning each small frame to an unrelated object in the room.
Calculate the outside size of the arrangement
Measure the full frame, not just the printed photograph. A mat and moulding can make an 8-inch image considerably larger on the wall. Write down each outside width and height, then include the gaps in the total.
For example, three frames that are each 10 inches wide with two 2-inch gaps create a row 34 inches wide: 10 + 2 + 10 + 2 + 10. Two rows of 10-inch-high frames with a 2-inch gap create a 22-inch-high grid. These are illustrative measurements, not a recommended product size or universal spacing rule.
Start with a gap that looks comfortable in your room, then keep it consistent within a regular grid. A larger frame may call for more breathing room than a small set. The paper-template test is more useful than forcing every wall to follow one measurement.
Use paper templates before making holes
Cut scrap paper to the exact outside dimensions of the frames. Label the paper with the photograph it represents, then place the templates on the wall using a method suitable for that wall finish.
Stand in the positions from which you will normally see the gallery. Check the grouping from the doorway and from a nearby chair. Look for enough space around switches, doors, and furniture, and make sure the collection feels like one intentional arrangement.
Leave the templates up long enough to see whether the scale still feels comfortable. Take a phone photograph of the planned wall. A small screen view can make an uneven gap or an overly crowded edge easier to notice.
Once you are satisfied, follow the frame and fixing manufacturers' instructions for the frame weight and wall material. Use suitable secure fixings, and get installation help if you are unsure about the wall construction. Do not treat a temporary paper-template adhesive as a mounting method for the finished frames.
Match each photograph to its frame shape
Review the actual crop before printing. A square frame can suit a close portrait but may cut off people at the edges of a wide family group. A border or mat can give a rectangular image a place in a square frame without sacrificing the full composition.
Use the printing size and resolution guide to check the pixels available after cropping. Confirm the printed image area separately from the outside frame size, especially when a product includes a mat or decorative border.
Keep faces at a comfortable scale across the arrangement. If one small print is a distant room view and the next is an extremely tight face crop, decide whether that difference helps the story. You can retain variety while giving the main portrait the clearest visual role.
Think about the photograph inside the frame
For valuable originals, consider displaying a copy and storing the original safely. The Library of Congress recommends separating the photograph from the glazing with a mat or spacers and notes that light damage accumulates even behind protective glazing.
Keep unused prints in suitable enclosures rather than a loose pile awaiting their turn. The Library's photograph care guidance recommends stable storage conditions, limited light, and photo-safe housing. A simple labelled box can hold the next selection and the dates associated with it.
Make updating the wall a small ritual
Decide whether the gallery is permanent or seasonal. A first-year series might change every few months, while a three-generation family grouping may stay in place for years. Keeping the frame sizes consistent makes image changes simpler.
Save a note of the print dimensions, crop choices, and frame order. When you replace one photograph, you will not need to reconstruct the whole plan. Our monthly baby photo ideas and first-year organisation guide can help keep future options easy to find.
Explore Baby Lovin prints and frames
Baby Lovin offers 8 × 8-inch prints at US$10 each with a minimum of six, and 20 × 20-inch wooden framed prints at US$25 each with a minimum of three. Use the product information to plan a possible collection, then confirm actual outside dimensions, image area, mounting details, and crops with the studio. Contact the studio to confirm current ordering and delivery options before planning your purchase or a gift deadline.
Frequently asked questions
How many pictures should a baby gallery wall include?
Start with the wall and the story. Three meaningful photographs can make a complete collection. Add more only when the space and images benefit from it; a full first year can also live in a book.
Can I hang frames above the crib?
Choose another wall. Keep artwork away from the infant sleep area and out of children's reach. A hallway or adult living area can provide a useful location for the same collection.
Should every frame match?
They do not have to. Repeating one element, such as light wood or a cream mat, can connect different sizes. If the photographs already vary greatly, matching frames are a simple way to make the group feel coherent.
What if I rent and cannot drill into the wall?
Check the property rules and the frame and mounting-system instructions. If you cannot install the frames securely in a suitable location, choose a photo book or another display format that fits the space rather than improvising a weak wall mount.
Sources